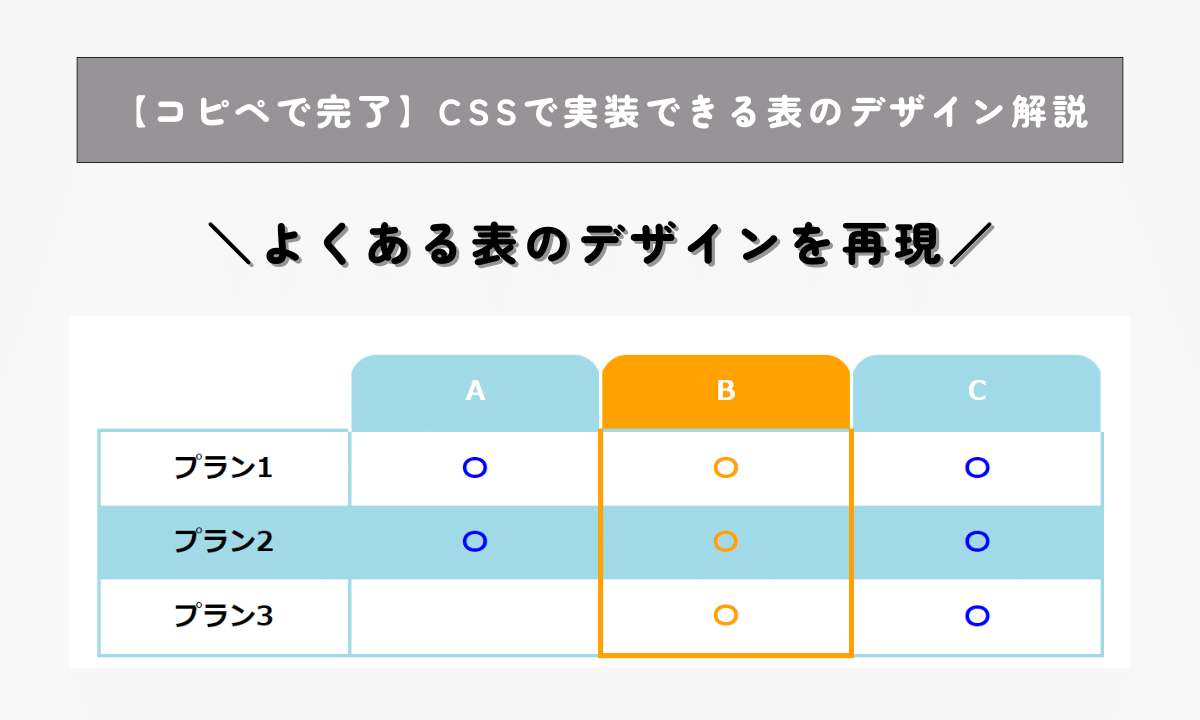
この記事では「CSSで実装できる表のデザイン」について解説します。
テーブル(表)レイアウトは、Webサイトでよく出てくる頻出パーツです。
今回はHTMLとCSSだけで実装できる表のデザインを3つ紹介します!
- HTMLとCSSで表の実装方法がが分かる
- 表デザインの実装がコピペでできる
交互に背景色を変えた表
1行ずつ交互に背景色を変える表の実装コードは以下になります。
See the Pen 交互に背景色を変えた表 by 山中滉大 (@tips-web) on CodePen.
<table class="c-commonTable">
        <tr>
          <th>A</th>
          <th>B</th>
          <th>C</th>
        </tr>
        <tr>
          <td>D</td>
          <td>E</td>
          <td>F</td>
        </tr>
        <tr>
          <td>G</td>
          <td>H</td>
          <td>I</td>
        </tr>
        <tr>
          <td>J</td>
          <td>K</td>
          <td>L</td>
        </tr>
</table>
.c-commonTable{
width: 100%;
border-collapse: collapse;
border-spacing: 0;
}
.c-commonTable th,.c-commonTable td{
padding: 10px 0;
text-align: center;
}
.c-commonTable tr:nth-child(odd){
background-color: #f7f7f7;
}
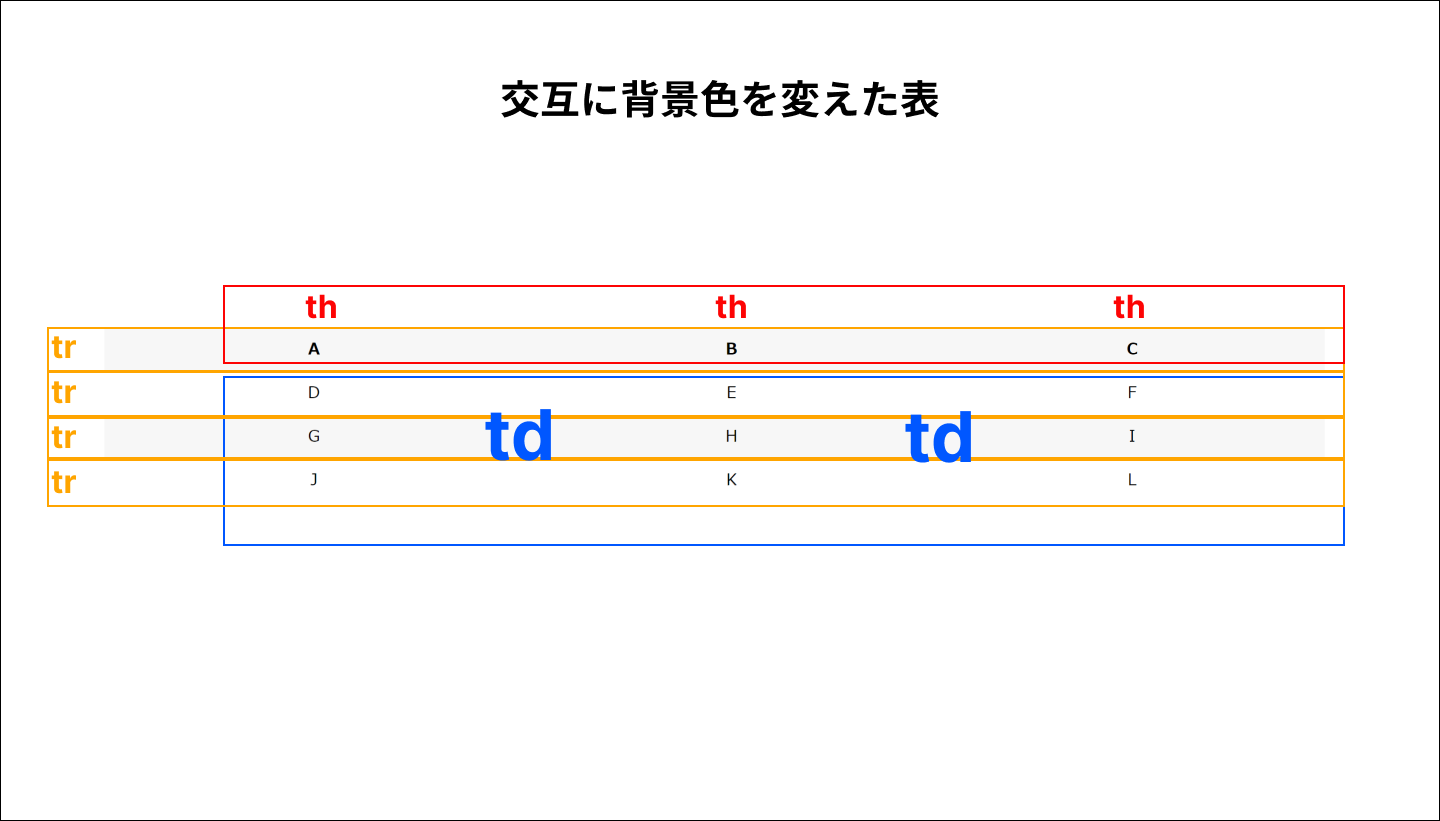
交互に背景小を変えているのは、c-commonTable tr:nth-child(odd)の部分です。
nth-child(odd)は、奇数行のみ指定することができます。
偶数行のみ指定したい場合は、nth-child(even)で指定できます。
以下のような構造をイメージしましょう。

見出しに装飾がある表
見出しに装飾がある表の実装コードは以下になります。
See the Pen 見出しに装飾がある表 by 山中滉大 (@tips-web) on CodePen.
<table class="c-commonTable2">
        <tr>
          <th>タイトル</th>
          <td>テキスト</td>
        </tr>
        <tr>
          <th>タイトル</th>
          <td>テキスト</td>
        </tr>
        <tr>
          <th>タイトル</th>
          <td>テキスト</td>
        </tr>
</table>
.c-commonTable2 {
border-collapse: collapse;
width: 100%;
}
.c-commonTable2 th, .c-commonTable2 td {
border: 2px solid #fff;
background-color: #f6f6f6;
padding: 20px;
}
.c-commonTable2 th {
background-color: lightblue;
color: #fff;
text-align: center;
width: 25%;
min-width: 100px;
position: relative;
}
.c-commonTable2 th::before {
  content: '';
  position: absolute;
  top: 50%;
  left: 100%;
  transform: translateY(-50%);
  border: 12px solid transparent;
  border-left: 12px solid lightblue;

}

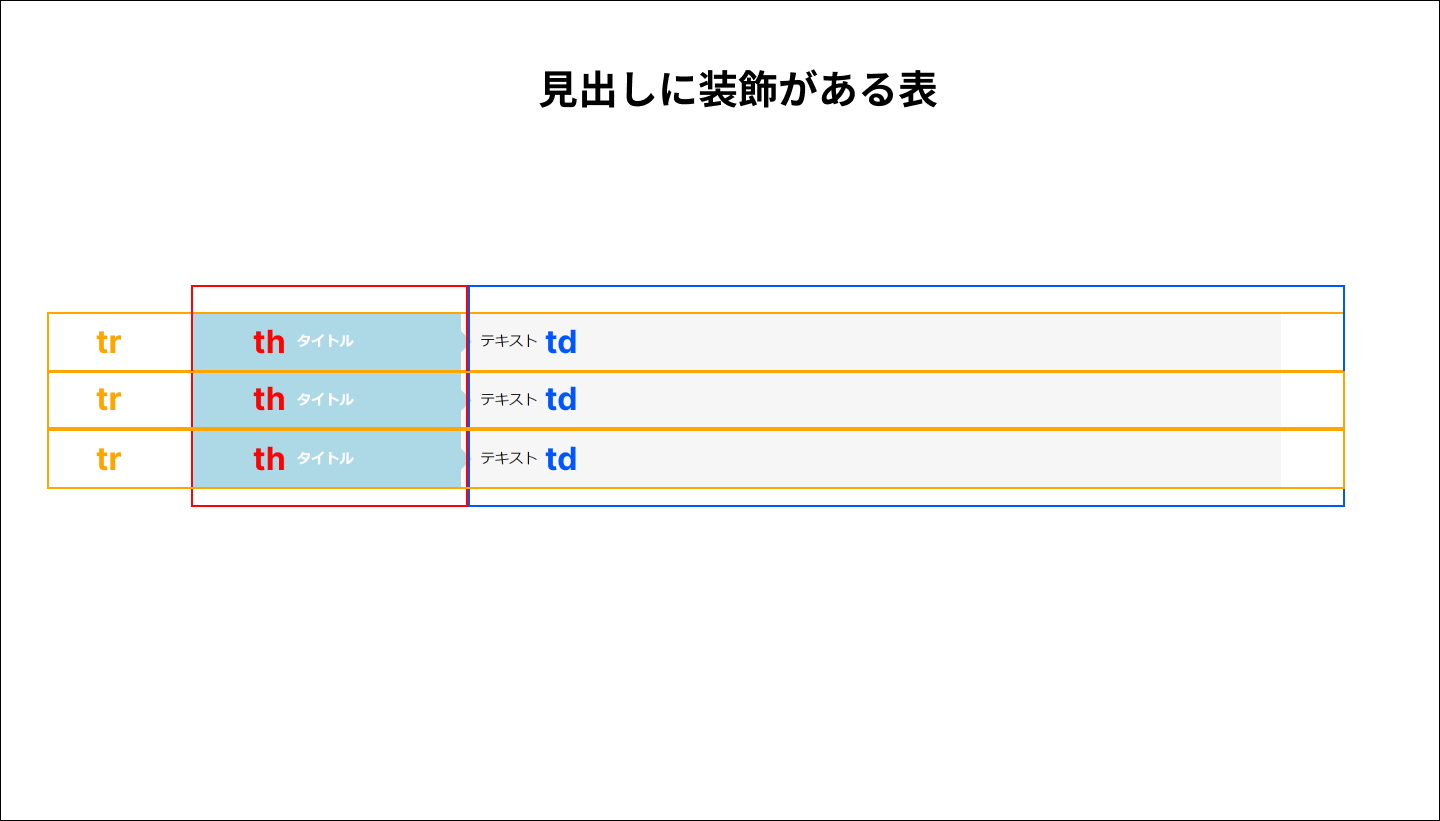
見出しの三角形矢印装飾は、以下のコードで作成しています。
.c-commonTable2 th::before {
content: '';
position: absolute;
top: 50%;
left: 100%;
transform: translateY(-50%);
border: 12px solid transparent;
border-left: 12px solid lightblue;
}
以下のような構造をイメージしましょう。

プランで使える表
プランで使える表の実装コードは以下になります。
See the Pen プランで使える表 by 山中滉大 (@tips-web) on CodePen.
<table class="c-commonTable3">
      <thead>
        <tr>
          <th></th>
          <th>A</th>
          <th>B</th>
          <th>C</th>
        </tr>
      </thead>
      <tbody>
        <tr>
          <th>プラン1</th>
          <td>〇</td>
          <td>〇</td>
          <td>〇</td>
        </tr>
        <tr>
          <th>プラン2</th>
          <td>〇</td>
          <td>〇</td>
          <td>〇</td>
        </tr>
        <tr>
          <th>プラン3</th>
          <td></td>
          <td>〇</td>
          <td>〇</td>
        </tr>
      </tbody>
    </table>
.c-commonTable3 {
  border-collapse: collapse;
  table-layout: fixed;
  width: 100%;
  font-weight: bold;
  text-align: center;
}
.c-commonTable3 thead th {
  padding: 10px;
  border-right: 2px solid#fff;
}
.c-commonTable3 thead th:not(:first-child) {
  background: lightblue;
  color: #fff;
  border-radius: 16px 16px 0 0;
  padding: 10px;
}
.c-commonTable3 thead th span {
  font-size: 11px;
}
.c-commonTable3 thead th:nth-child(3) {
  background-color: orange;
  position: relative;
}
.c-commonTable3 tbody {
  border: 2px solid lightblue;
}
.c-commonTable3 tbody tr {
  background-color: lightblue;
}
.c-commonTable3 tbody tr:nth-child(odd) {
  background-color: #fff;
}
.c-commonTable3 td {
  border-left: 2px solid lightblue;
}
.c-commonTable3 td {
  color: blue;
  padding: 10px;
}
.c-commonTable3 td:nth-child(3) {
  color: orange;
  border-right: 3px solid orange;
  border-left: 3px solid orange;
}
.c-commonTable3 tr:last-child td:nth-child(3) {
  border-bottom: 3px solid orange;
}

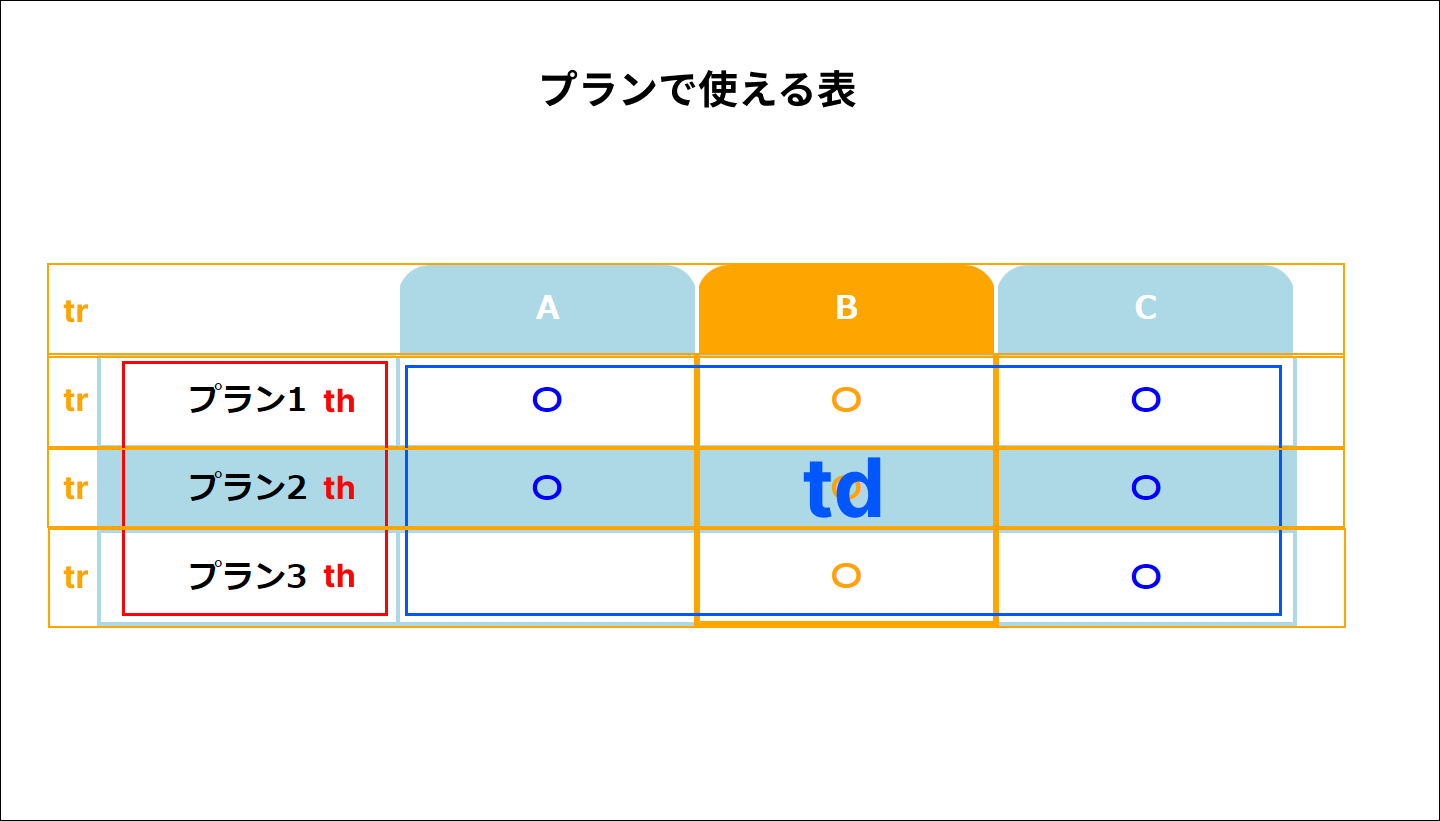
交互に背景色を変えているのは以下のコードになります。
.c-commonTable3 tbody tr {
  background-color: lightblue;
}
.c-commonTable3 tbody tr:nth-child(odd) {
  background-color: #fff;
}
「B」列のオレンジ装飾は、以下のコードになります。
.c-commonTable3 thead th:nth-child(3) {
  background-color: orange;
  position: relative;
}


.c-commonTable3 td:nth-child(3) {
  color: orange;
  border-right: 3px solid orange;
  border-left: 3px solid orange;
}
.c-commonTable3 tr:last-child td:nth-child(3) {
  border-bottom: 3px solid orange;
}
thead th:nth-child(3)で、theadタグの中の3つ目のthを指定しています。
同様に以下のコードで3番目のtdに対して左右の線の色を変えています。
c-commonTable3 td:nth-child(3) {
  color: orange;
  border-right: 3px solid orange;
  border-left: 3px solid orange;
}
同じく、以下のコードで最後のtr行、3番目のtdの下線の色を変更しています。
.c-commonTable3 tr:last-child td:nth-child(3) {
  border-bottom: 3px solid orange;
}
以下のような構造をイメージしましょう。

まとめ
CSSで実装できる表のデザインについて解説しました。汎用性のあるデザインなので、コピペですぐに使うことができます。
他にもさまざまなデザインの表があるので、カスタマイズしてみるといいでしょう!
.jpg)
